Shared calendars can easily be used
to add more than one class or calendar for multiple grades/groups. For
instance, it may be useful in the case of shared breaks across several classes, or subjects
with a particular theme.
A shared calendar works in the same
way as a calendar for classes in terms of creating different courses, adding
teachers, and so on. When a shared calendar is being merged with a grade/group,
all of the activities in the shared calendar will be visible to the merged parties.
How to create a shared calendar:
1. Click on “Shared calendars” in the menu on the left side and then click on “Create shared calendar”
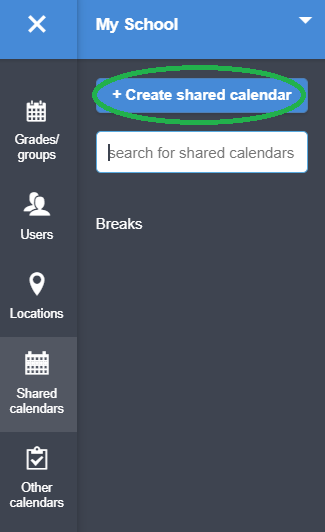
2. Name the shared calendar. For
instance “Breaks”, and click on the blue button “create”. Note, you may create several
shared calendars at once by adding several names to the list.
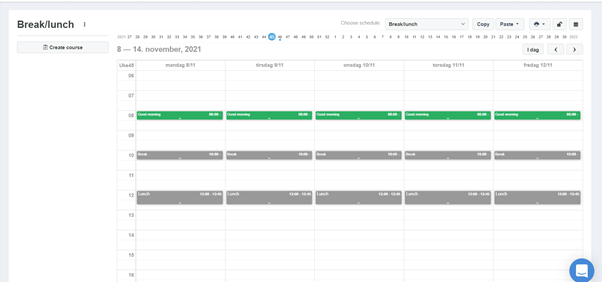
3. The shared calendar is now created. It is visible in the list among shared calendars and you can always access the calendar from here. The courses which have been merged with a grade will be visible in the classes and their calendar. In the example provided below, we have merged "break", among others, with all classes. The courses are created for one week, then they are copied and pasted into the whole school year. (Read: Copying)
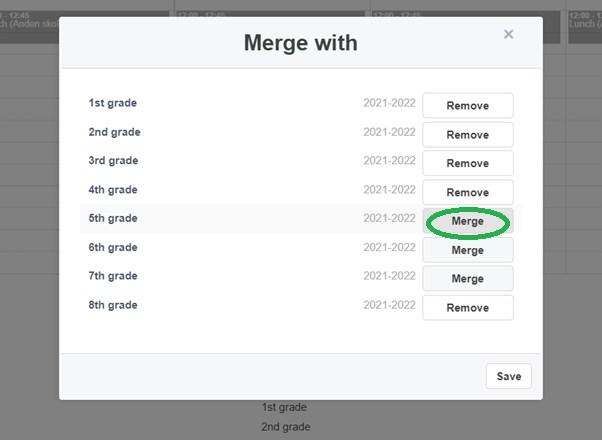
4. To merge the calendar with a grade, you click “Merge with a grade/group” below the calendar. Select the specific classes with which the calendar is being merged with. In the same way, it is possible to merge the calendar with a classroom. If there are any later changes in the shared calendar, these changes will simultaneously change in the classes’ calendar which the calendar is merged with.
You may also watch the video from our tutorial where we demonstrate how to create a shared calendar.