This guide is divided into two sections. Part 1 deals with how to start using teacher-subject allocation based on:
1. Creating a new school year
2. Creating groups/grades
3. Creating subjects
4. Assign teaching hours to teachers
5. Introduction to teacher-subject allocation
Part 2 concerns other useful information when scheduling in Docendo, such as:
6. Creating 'Other calendars'
7. Working hours
8. Locations
9. Creating Holidays
10. Tips to schedule calendars for grades/groups
Part 1: How to get ready for subject allocation by creating a new school year and subjects
Part 1: How to get ready for subject allocation with a new school year and create classes/subjects
1) Create school year
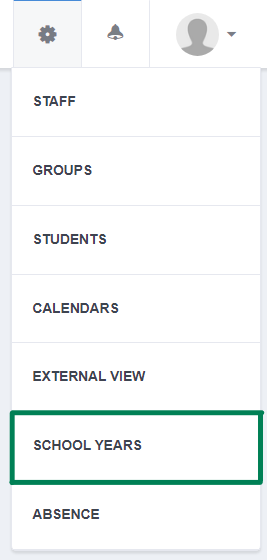
Start by creating a school year. You do this by clicking on the gear icon (⚙️) top right-side corner, “School years”.
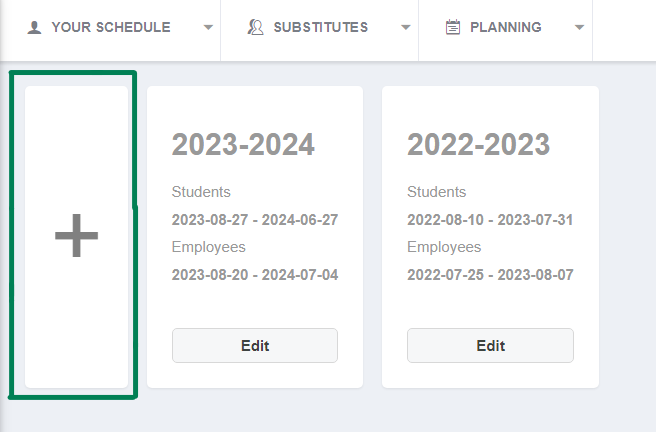
Click the plus icon to create a new school year and select start- and ending dates.
2) Create groups/grades
Now, you may create groups for the new school year. Go to “Grades/Groups” on the left side menu, select the new school year and click “Create grade/group”. You can create several groups at the same time.


3) Create subjects
When your grades are created, the next step is to create subjects. Click on “Create course” on the left side, and type in all the information about the course, such as the name, the teacher, the room, duration of the course, and hours in the school year. You may also choose a color for the course, and the type of subject category it is. Finish by clicking “Create course” to the bottom right.

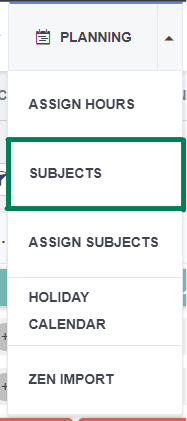
As an alternative, you can create and add subjects for several grades by going to “Planning” and pressing “Subjects”. To create subjects here, click “Create course” at the top right side, and type in the same specifications of the course as described above.


Here, you get a complete list of all courses that are created. You can now select courses for one or several grades. To add these subjects, click on the plus-icon next to the course and below the grade followed by typing in the number of hours the course shall have.
4) Assign Hours
In “Planning”, there is a function called “Assign Hours”.
This function allows you to add working hours for each teacher/user in Docendo equivalent to the teachers’ availability. Hours of teaching, tasks, and preparation make up the total number of working hours. The number of assigned teaching hours is useful when subjects shall be assigned (see next step).
The numbers of assigned hours can be edited and specified for each user. You may filter the display by using groups/tags, such as math teachers or substitutes (for more information, see “Groups”).


5) Assign Subjects
Now, it is time to assign subjects to the teachers. This is found in “Planning” and then “Assign Subjects”.

On the left hand in “Assign subject” there is a list of all the staff and users at your school. Below each persons’ name, there is detailed information on what courses and hours each person is assigned. In the middle of the page, you see all the grades and their subjects.

If you click on one subject, you can edit the hours for the course, as well as the teacher and location. To save the changes, click “update subject” on the bottom right. The hour count for the teachers will simultaneously be updated in “Assign hours”.

On the top right corner, you can choose to only display subjects without teachers. This function provides a great overview of courses that still need to be assigned to teachers as they disappear from the list at the same time as they are being assigned.

You can use groups to filter the display to specific grades/groups, such as 1st grade.

This is particularly useful for groups of teachers that assign subjects between themselves.
Each subject contains a log. Consequently, you can see who did the latest changes for the subject. Select the subject and click the “History” tab to the top right-side corner.

Part 2: How to get ready for subject allocation by creating a new school year and creating subjects
6. Creating other calendars (i.e staff- or Team meetings)
If there
are other activities you would like to have scheduled in a separate calendar, “Other
Calendars” is a great function for this type of schedule. For instance, you can
create calendars for staff- or team meetings, where you add the teachers you
want to be included, and schedule meetings. The scheduled activity will appear
in the calendar of the teacher that is linked to the activity.
For a short introduction to “Other calendars” you may click this: link.
We recommend scheduling team meetings or other activities, as these activities will be marked as occupied in other schedules as well (classes, locations, users). Thus, the meeting will appear as a double booking if the teacher already has something scheduled in other calendars in Docendo.
7. Working hours
Typing in the
working hours for a user/teacher can be useful when scheduling to keep track of availability, as these timeframes will show when someone wants to schedule this person. In the same way, working hours apply
for substitutes. Thus, this function can make it easier to manage absence, as you
get an overview of the available substitutes.
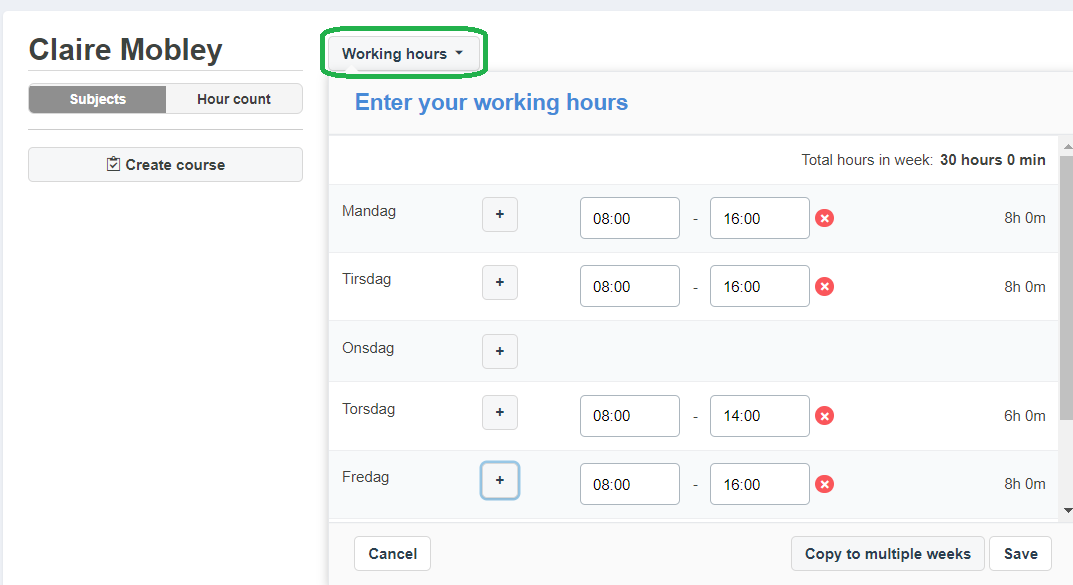
You can
add working hours by selecting each staff members’ personal calendar and clicking “Working hours” in the top left of their calendar.
The total amount of working hours during the school year is listed in “Assignment
overview” in each persons’ calendar.
8. Locations
A good starting point when scheduling, is to link locations with the course, such as the swimming pool to swimming and art room to Art class. This will be useful when you later schedule, as the location is already connected to it. A teacher can, in the same way, also be linked to the subject. You can allocate locations to a course when you create it.
For additional information about locations, you can read about it through the following: link.
9. Holiday Calendar
We recommend
you to create Holidays in the Holiday Calendar. To add these, go to “Planning” in the top right and then in the drop-down menu click “Holiday Calendar”.

Select the right school year and mark off the dates that are Holidays during this school year. When you copy a scheduled week later on and paste it across several weeks or the whole school year, these Holidays will be left blank.
10. Tips to schedule calendars for grades/groups
The
information above provides a good basis to get you started on scheduling in
Docendo. Nevertheless, here are a few more additional tips when scheduling:
-Select
one template, or script, for a week, which you and your colleagues can use when
scheduling grade’s calendars.
-When
calendars are being scheduled, you will soon begin to see 'shadow' boxes in
places that mark when teachers and locations are already scheduled. Use these
shadows as guidance for where you can schedule other activities, instead of
going back and forth to check each calendar.
-If you have
linked locations to courses in “Locations”, the same connections will apply
when you schedule in the grade’s calendars. Using these subjects when you
schedule, could be time saving for you, as you do not have to add locations to the
subject.
-Add yearly
hours for the subject and use these as guiding when scheduling. It will help
you to come as close as possible to the number of hours you want it to be
scheduled within a school year.
-Sometimes
it may be useful to have several tabs open at once, for instance, 1st
grade in one tab and 2nd grade in another. This makes is easy to
switch from schedule to schedule when planning. Alternatively, you can use the Schedule Overview.
-When all
of the template-weeks are being created, they can quickly be copied and pasted
to the rest of the school year. Find the week and click “Copy”, followed by “paste”
and select the weeks it shall be placed into.